11.2019 | Choclate chest
I wanted to make a nice birthday present for my wife and decided to make a jewelery chest made completly out of choclate.
The plan was to 3d print a model first, make a mold of the 3d model and then create the final choclate chest out of the molds. At first i looked for a nice 3d object i could print out with my 3d printer. After searching some time i finally decided to take a very creative box that has many details on the top. Maybe it would be difficult to make a detailed choclate model out of it. However, i wanted to try.
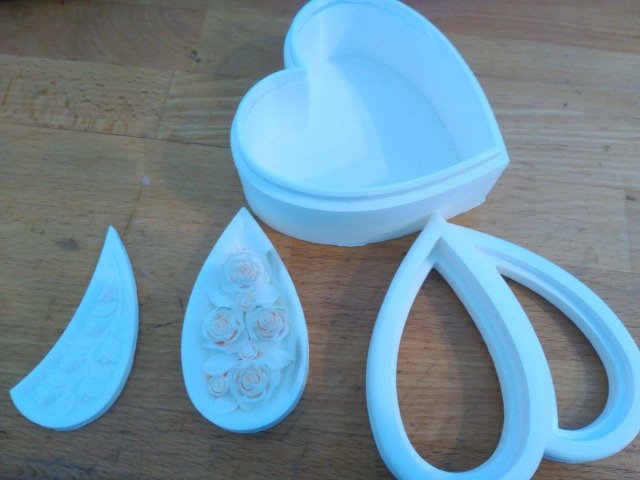
As you can see, the model consists out of 4 parts which can be put together in the end. This is nice because for each part a diffeent choclate can be used. I decided to make the top part out of white and milk choclate and the bottom out of dark choclate.
Besides you can find this fantastic 3d model here.
After printing out all parts i started with the first top parts and made some molds with food safe silicone.
Because choclate (i used high quality cuverture with at least 38% percent cocoa butter) cannot be 'just melted', but needs to be tempered correctly to avoid bloom on the surface, i melted the different choclates with a temper machine that can mostly guarantee the correct temperatures needed. (if you want to know more about melting technics and what machine or choclates was used, see below at the resources section).
I started with melting the white choclate and the results were better than i at first tought to be.
The top parts! Ready to be mounted into the main top part.
Next part was the main top part (made out of milk choclate). This part was quite difficult to unmold and it was stuck at first so i needed to cut the silicone for better unmolding.
Then i mounted the top parts all topgether, i am happy with the result but it could be more smooth next time tho :). I glued the parts together wit a bit help of sugar icing.
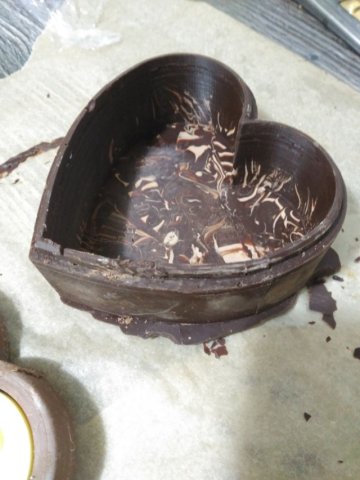
I needed to melt the bottom part three times, because one of it broke and another one was wrong tempered. But in the end i got one bottom that was .. acceptable. Sadly, as you can see, some of the cocoa butter sepereated itself from the choclate and because of that it gave me this interesting texure.
And here is the final product. Completly eatable. The top fits perfectly so you can close/open it. It took me all about 3 weeks and over 100€ to get all this done.
Resources used:
- REPLISIL 35 NO Lebensmittel transluzent SET | about 69,90 € with postage
- TFC Troll Factory Silikon Kautschuk Typ 6 Lebensmittel aprikot weich Shore 22 1:1 29,90 €
- Sorry, but i cannot list the price of the filament here, but it was maybe around 2-4 € without calculating the power usage of the printer.
- 1 kg Zartbitter-Kuvertre Schokinag (0814)7,95 €
- 1 kg Vollmilch-Kuvertre Schokinag (0813)7,95 €
- For the white choclate i used some from the supermarket 2 small packets were together about 4 to 5 €
- Porto for choclate 4,9 €
- Choclate Temper machine about 30 €
All in all the projects costs about 158,6 € if you need to buy everything. Its more cheaper if you have some food save silicone left that you can use. Also, if you are very exprienced with melting choclate you du not need to use a temper machine.


